Pages

Friday 11 January 2019

Simple Sew: Cara Jumpsuit

Early in the summer I made a jumpsuit by another pattern designer and surprised myself by really liking it, so when it came to choosing the last of my Simple Sew makes for 2018, I thought that I would go for the Cara Jumpsuit and make it in a rather nice dark teal stretch velvet that I already had in my stash - perfect timing for party season.


The pattern would have been pretty straight forward to make up had I not changed several things while I was making it. I did note that there is no information on the pattern envelope about requiring bias binding. Luckily I read the instructions before I planned to start so was able to to go and get some the next time I was in town.  If I had started this without reading the instructions first, it would have been very frustrating.

Because of my choice of fabric some parts were trickier than they would have been in a thinner fabric. Turning the tubes to create the ties was the first thing I did and turning stretch velvet in to tubes is not to be recommended!
Turning tubes
 Attaching the bias binding also took a while and I didn't want visible stitching on the outside of the garment, so I did a lot of hand stitching on this step.


Different stages of  applying bias binding
At some point in the construction I thought it might be a good idea to have some pockets, so I used the pocket piece from the Lapwing Trousers to create in-seam pockets.  I cut the pocket pieces from some lining fabric and then spent some considerable time trying to sew the pockets in. Because of the nap of the velvet and the slipperiness of the lining fabric, every time I tried to sew in the pockets they shifted.

Baste fitting
When I did a baste fit of the whole garment the pockets ended up too far down my leg every time and I must have done them about 4 times!  I decided that that was enough and just cut them out and sewed the side seams up as I should have done in the first place! They were such a disaster that I didn't even take any photos of this bit. In retrospect I should have altered the pocket pattern piece so that it would attach at the waistband as well as the side seam, then there would have been less shifting down the leg.

During baste fitting, I also decided that I didn't  like the length or shape of the bodice on me and decided to separate the top and bottom again. The easiest way to do this was to just cut the waist channelling off  - no faffing about trying to unpick overlocking on this fabric!
cutting off the waist channel
I finished off the trousers by creating a waistband for elastic from some spare fabric - basically just a rectangle of fabric that was the same length as the waist on the trousers, double the width of the elastic I wanted to use plus seam allowances.  I joined the rectangle at the short end to create a loop, folded the loop in half along the length and attached the raw edges to the trousers leaving a short section unsewn so that I could feed the elastic through. Having fed the elastic through the waistband and got it to a comfortable length I joined the ends and then finished sewing the waistband. Again, no photos of this bit, but the waistband technique is detailed in the True Bias Hudson pants sew along.

I then tried the top on on its own and decided to take the sides in. I basted this step a couple of times until it looked how I wanted.

taking in bodice side seams
 
So this ended up being a two piece outfit. I will wear both pieces together as a faux jumpsuit, but I thought the versatility of separates might mean that it got worn more.

I had thought, at one point in the construction, that I would be able to wear this to the New Craft House Christmas party but that wasn't to be. I have yet to wear this as it turned out too fancy for both our Christmas and New Years celebrations, but I have plans for the Dressmaker's Ball in March!
For now here are some finished photos in multiple locations trying to get decent lighting and representation of colour...


Friday 4 January 2019

FO: Drapey Drop Dress in stripes

So it is the beginning of a new year and time for me to catch up on unblogged items. I don't think there are too many this year....

This dress was a spur of the moment make.  It was blisteringly hot in the UK in the summer of 2018 and I decided that I wanted a simple jersey dress that I could just throw on and that wasn't too clingy. The pattern is the Madeit Patterns Drop Dress.  I had made the Drop top previously and had thought that I would make the dress sometime.

I had some stripey fabric in the stash, and I just about had enough and I mean just....


I concentrated on whether there was going to be enough fabric, rather than on any chance of stripe matching, but as it  happened I think it matched reasonably well.  The neck binding technique gives a great finish, but feels a bit bulky in this fabric.  I toyed with the idea of taking off the neckband and just turning the neck under and stitching, but it clearly didn't bother me that much as I still haven't done anything about!

I think next time I make this I will look at doing a small forward shoulder adjustment as both this and my previous version pull to the back  a little and make the neck feel tight when it isn't.

 So, a very successful quick make that was perfect for the sunny Norfolk coast.


Wednesday 21 November 2018

Wedding Guest accessories

This is a postscript to my last post to detail the accessories I made for us both for the wedding.


I made my husband a tie from the same fabric as my dress, and a little pocket square. I used the same pattern for the tie as I did for the grooms men's ties, and I think I even put one of the little labels in it as a reminder of the event.

At the last minute I realised that I didn't have a suitable bag. Having seen a lot of Ida Clutches on the Internet a little before this I thought that would be ideal. The pattern for the clutch is by Kylie and the Machine and is a free download.

The Ida clutch is such a great little pattern.  It is perfect for using up leftovers and with Christmas coming up ideal for quick and easy gifts.  There is so much information in the instructions for this, with a whole post all about interfacing adequately. The written instructions and the photographs are all very clear  and easy to follow, so enough gushing, here is my version!

I pulled out various bits of fabric from the stash to see what would go with the dress and the sandals that I had bought. I ended up with a piece of fabric left over from making curtains for one of my girls last year - it is a blush pink furnishing fabric (middle piece in the picture below) with a fair bit of structure to it.

I decided to line it with fabric leftover from my dress.  Even though the main fabric was reasonably stiff I followed the interfacing instructions and ended up double interfacing to get the stiffness I wanted.

I put in two little internal pockets and just followed the instructions


And as a finishing touch I put in one of the labels I had put in the ties


I could have made it a bit bigger given what I tried to fit in it, but this was a fantastic, quick make  and I will be making more!


Wedding Guest Dress

I posted a little while ago about the very special wedding sewing that I did earlier in the summer and this is the story of the dress that I wore to that wedding.

I was looking for a wrap style dress possibly with ruffles and I found the exact dress in the Style Arc Giselle.  However, when I looked at the line drawing I decided that it looked quite simple and that I could recreate it from the bodice block that I have drawn up in my pattern cutting class.

This obviously wasn't as simple as I thought it would be. I converted my bodice and skirt blocks into a wrap versions, drafted the circular ruffle, made up a toile and it was a disaster! The bones of it were there, but there was waaay too much fabric in the bodice and I couldn't work out why. I tried moving darts and taking it in, but it was turning into a bit of a dogs dinner.

For some reason I decided to check my measurements against the ones I had taken for my block 5 years ago and whilst I am roughly the same weight and size, my measurements were noticeably different, which accounted for the excess fabric in the toile. I decided to redraft my bodice block, so that I could then redraft the wrap dress. The redraft worked well and I made a second toile but it still didn't fit right.

At this point I was beginning to run out of time, so I gave in and bought the PDF of the Giselle.  I compared the Giselle pattern pieces to mine and could see immediately what I had done wrong on the second toile - I had forgotten to true up the waist when I had moved a dart. Unfortunately I didn't take any photos of any of this.

The fabric I used is viscose and it is lovely and floaty.  I got the fabric from Geoff Rosenberg of Stitch Fabrics, off his remnant table at one of his Trumpington Village hall sales. I made a size 10 using the Style Arc pattern  and it fitted really well. The instructions are pretty minimal, but having used Burdastyle magazine patterns in the past it was quite straight forward!  I did struggle getting the waist tie on to the the dress neatly, but I think I mis-read something earlier in the construction. I manged to bodge it pretty well and you can't see that bit of the dress when it is being worn.When I was trying the dress on just before it was finished, I realised that the skirt was slightly see-through at the back, such that you could see the colour and shape of my underwear. I very quickly cut a lining out of some silk and just lined the back of the skirt by hand stitching it to the waistline and down the side seams.

I have a few pictures of the construction of the actual dress:

Here I was finishing the edges of the ruffle/flounce.  I tried using a rolled hem foot on a scrap of fabric but didn't get on very well, so I overlocked the edges, folded over the edge and  sewed a very narrow hem
 There was a lot of gathering on the ruffle for the skirt portion of the dress

 Turning rouleau tubes for the waist ties
Checking out the finished dress
back view


And finally, a more relaxed vibe at Camp Workroom Social, waiting for the fashion show:


So in the end a very successful make. I was a little disappointed that I hadn't persevered with the drafting when I realised how close I had got with my version, but the finished dress and how I felt wearing it, wiped away that disappointment!

Wednesday 10 October 2018

Simple Sew Kimono Dress

This month’s Simple Sew make is the Simple Sew Kimono Dress - a wrap style dress with a large tie at the waist, except that mine is not going to be a dress. When we were asked for fabric and pattern choices for this make we were in the midst of an extremely hot summer and I had been sweltering in my winter dressing gown in the mornings, so I decided that I would like a summer ‘robe’.


The fabric is a beautiful Lady McElroy cotton lawn very generously supplied by Doughty's Online. It sewed beautifully,  ironed really well and feels lovely on.

I cut a size 12, but kept the length of the size 20 - I like my dressing gown/robes to be quite long. This style has grown on sleeves which means that sleeve and the body are all one piece. I quite wanted longer sleeves but the front pieces are quite big due to the wrap and the sleeve, so a longer sleeve would have meant that the piece wouldn’t fit on the fabric.

I also wanted pockets so having sewn the shoulder seams together,  I pinned the side seams, tried it on and worked out where I wanted to add the in seam pockets.  My winter dressing gown had large patch pockets, but I felt that wasn’t the look I wanted for this. I used the pocket piece from the Lapwing trousers and placed it roughly where I wanted my hand to rest.

 
Having put in the pockets and sewn up the side seams the robe was looking pretty good. The instructions have you finish the edge of the front, then turn and stitch down.  I thought this would not give the finish that I wanted, particularly around the neckline  - and this is where this project started to take its time -  I decided to make some bias tape to finish the edge.  I have recently taken out of use a duvet set that was the exact pinky lilac colour of the flamingos. I used a tutorial by Colette for continuous bias binding. This technique is a bit fiddly but I find it much easier than joining lots of strips of fabric. I didn’t think to take pictures of what I did so have included the link.  Quite a small square of fabric makes a surprisingly long piece of bias tape! I machine stitched the bias on to the edge, then folded it over and hand stitched  all the way around the front. Having done that, I then hand stitched the sleeve hems and the hem of the garment.

I used some the bias tape to make a rouleau and used it to make a couple of ties for inside the robe to help keep it closed.


I added belt loops to stop the belt from falling off and I also made a hanging loop so that it can hang on the bathroom door


I am very pleased with it and a little bit disappointed that the weather has become much cooler, so I won’t be wearing this properly until next summer. It is a very easy sew and would be quite quick if you didn’t add bias tape and hand stitching to the mix!


Wednesday 3 October 2018

Very Special Wedding Sewing: Ties

At the beginning of the year we found out that one of our much loved cousins had just got engaged. There was much excitement and speculation about plans and clothes! The groom, Joe, got in contact and asked whether I would be prepared to either head up a working party or do it myself, to make him and his groomsmen ties for the wedding.  His initial idea was to have bow ties for all, but on discussion with his mates and brothers decided that they would all have normal ties and he would have the bow tie.

We had a fantastic day shopping for fabric - he had a swatch of the fabric for his suit and had expressed a liking for Liberty style fabrics. I knew Joe was colour blind, but hadn't appreciated which colours he can't 'see' - I spent a lot of time trying to explain what different colours were and which ones were which, which made for quite an entertaining time. I took him to Fabric Galore as I had heard they have a range of Liberty fabric, but we didn't find anything that he liked.  Our plan then was to go to Shaukat in Kensington, and if we didn't find anything there then we would aim for Liberty itself. Shaukat is a shop that sells exclusively Liberty fabric for less than Liberty, and it has masses of stock (much more than Liberty does) both of current fabrics and past.
We got to Shaukat and couldn't believe the range of fabric there. After feeling a little overwhelmed we found the perfect fabric:

After leaving Shaukat, we went to MacCulloch and Wallace, where I had already scouted out the tie canvas for the lining of the ties and we also bought the silk for the tips of the ties.
Having made a tie for my husband a couple of years ago, using an old tie of his as the pattern I was ready to go. 

I felt that I had a pretty good idea of what I was doing, but wanted to read a bit about tie making before I started.  There are a lot of tutorials on how to make a machine sewn tie, but not much information on sewing a 'proper' tie.  The most informative site that I found regard the making of ties was Thread Theory, the Canadian menswear pattern company. They have a very useful tutorial for making a silk tie, complete with links to various sources that they had found useful.

I tidied up the pattern that I had made from the old tie and had taken on board the request from one of Joe's brothers that the ties not be 'kipper' ties! I had shown him the pattern piece and I think he thought that would be the finished size! There was a lengthy discussion on the finished width of the larger end of the tie - 2 3/4 inches/just under 7cm was the final decision.
I had done quite a bit of prep to try and work out how much fabric I would need for 9 ties and 2 bow ties (the second bow tie was for the brides dog!). As you can see above, ties are cut on the bias to allow some stretch when they are being tied. I had hoped that there would be a magic formula on the internet but I couldn't find much that was helpful. I ended up cutting multiple tie pieces from paper, laying them out and measuring the amount of space they took up.  Unfortunately I did not make a note of the metreage I thought I would need, nor the amount that we actually bought.


Above are all the pieces for the ties - Each tie is made of three pieces, plus 2 lining pieces for the tips of the ties (the white triangular-ish bits) and the lining so that was 54 cut pieces of fabric for the ties and 6 cut pieces for the bow ties!

I batch sewed all the different tasks - so I sewed all the tie pieces together and pressed the seams, then sewed one side of the tips for all ties before sewing the other side of the tips. It sounds quite complex but the batch sewing really helped me keep organised with everything.

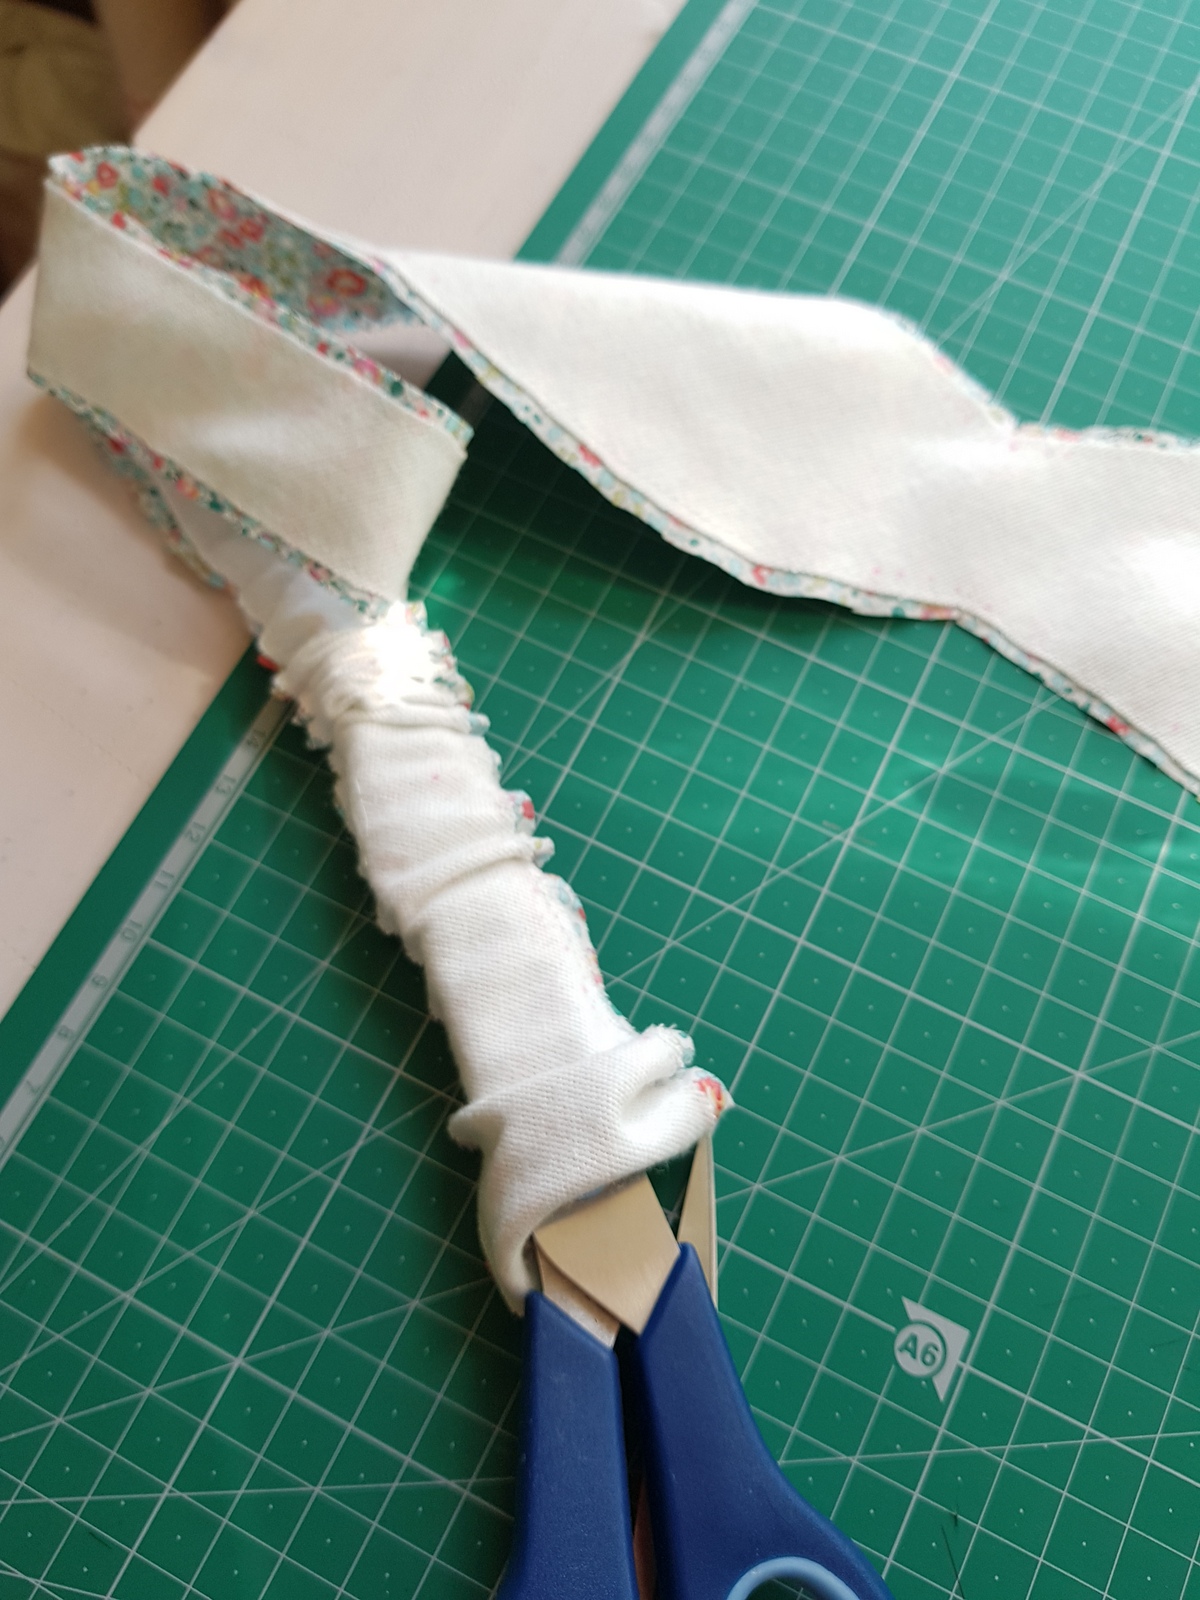
Having constructed all the ties and pressed all the tips, I then added the tie canvas - the strip of canvas is laid down the middle of the tie, then the edges are folded in. These edges can overlap slightly and this is the central seam down the back of a tie.  This seam is hand sewn carefully so that the stitches are not too tight. If the stitches are too tight then the tie can pucker and not stretch sufficiently when it is being tied.


Having completed all the ties I was super pleased with how they had turned out, but I wanted a little extra to make them even more special. I thought it would be nice to put some sort of label in and spent quite some considerable time trying to find somewhere that could do a small quantity of printed fabric labels. After extensive search of the internet I found a company called Bags of Love whose minimum order was 20 (still more than I needed but much better than 50, 75, 100, 250 that all the other places I had found) for about £20. You can chose the size of your label from a selection, add text, colour of text, images etc.  I chose to have the bride and grooms names and their wedding date in a colour that went with the tie.  They looked perfect and I was almost as pleased with the labels as I was with the ties!
I used a pattern for the bow tie that I had found on the internet - the one I ended up using was from Sew Like My Mum. This was one of very few patterns for tie-able bow ties, rather than a pre-tied nonadjustable bow tie.  Making the bow ties was pretty simple, the trickiest bit was turning the ties right side out and making sure that the corners were nice and crisp. A good press made what started off looking like a crumpled rag look pretty smart!


So after all that, here are some pictures of the ties in action: